
The Great Kitchen Drawer Disaster (And How I Fixed It)
Let me tell you about my kitchen’s “junk drawer.” Except it wasn’t just one drawer. It was like three drawers had a baby, and that baby grew up to be chaos.
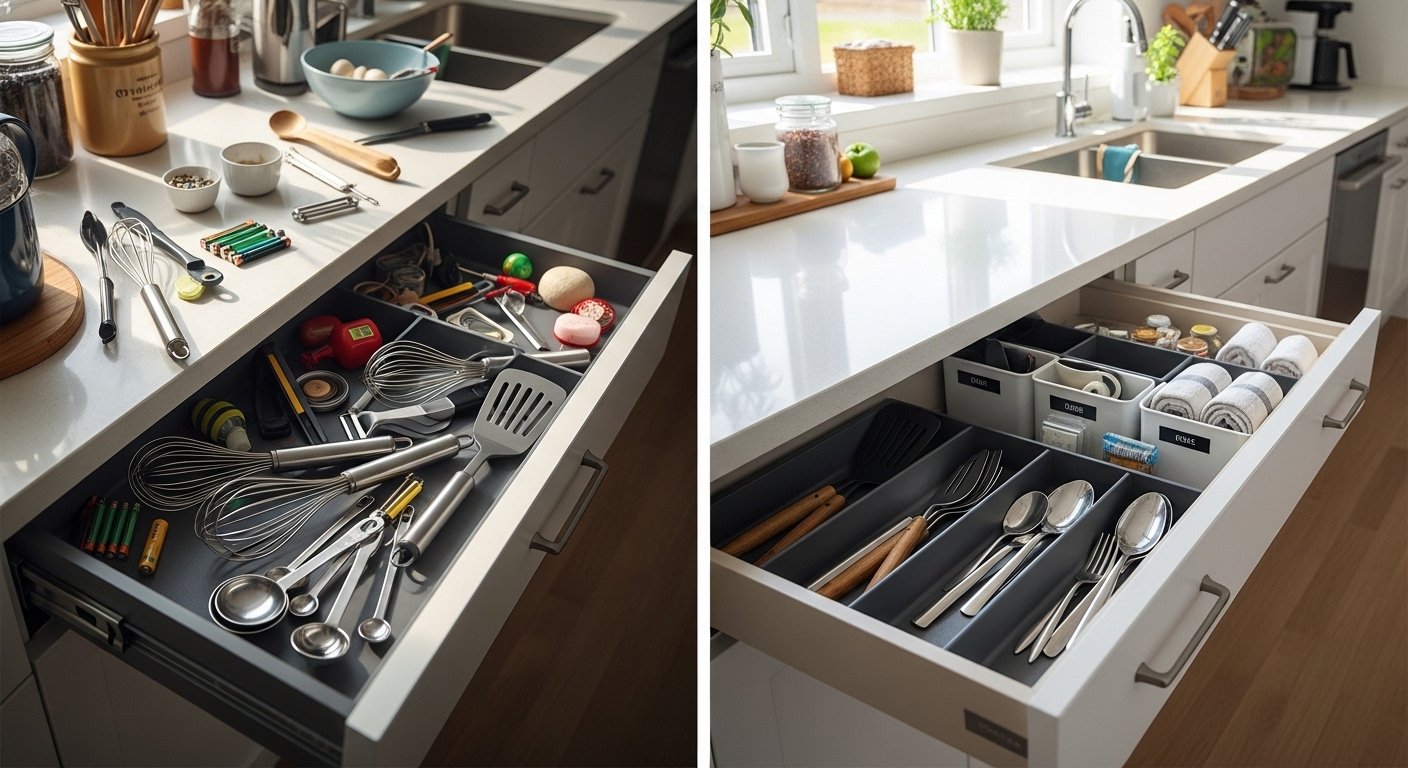
You know the one I’m talking about. You open it and immediately feel overwhelmed. Random utensils. Gadgets you bought once and never used. Three different peelers for some reason. A whisk that’s been bent for years but you keep it anyway. Batteries that might be dead or might not, who knows?
Every time I cooked, I’d spend the first five minutes digging through this mess looking for one specific thing. By the time I found it, I was already frustrated and my onion was half-chopped with a dull knife because I couldn’t find the peeler.
Finally, I snapped. Dumped every drawer on the kitchen table and refused to put anything back until I had a system.
Best decision I ever made.
Here’s exactly what I did, including the mistakes so you can skip them.
Step 1: Empty Everything and Face the Truth
This part is brutal but necessary.
Pull everything out of every kitchen drawer. Not just one—all of them. Dump it on your counter or table. You need to see the full scope of the problem.
Then start sorting.
Make piles:
- Stuff you actually use (spatulas, measuring cups, good knives)
- Stuff you use occasionally (that weird avocado slicer, the melon baller)
- Stuff you haven’t touched in a year (be honest)
- Stuff that’s broken or useless (bent whisk, missing parts)
Be ruthless. That random gadget from a infomercial five years ago? If you haven’t used it by now, you never will. Donate it or toss it.
I got rid of about a third of what I had. Immediately felt lighter.
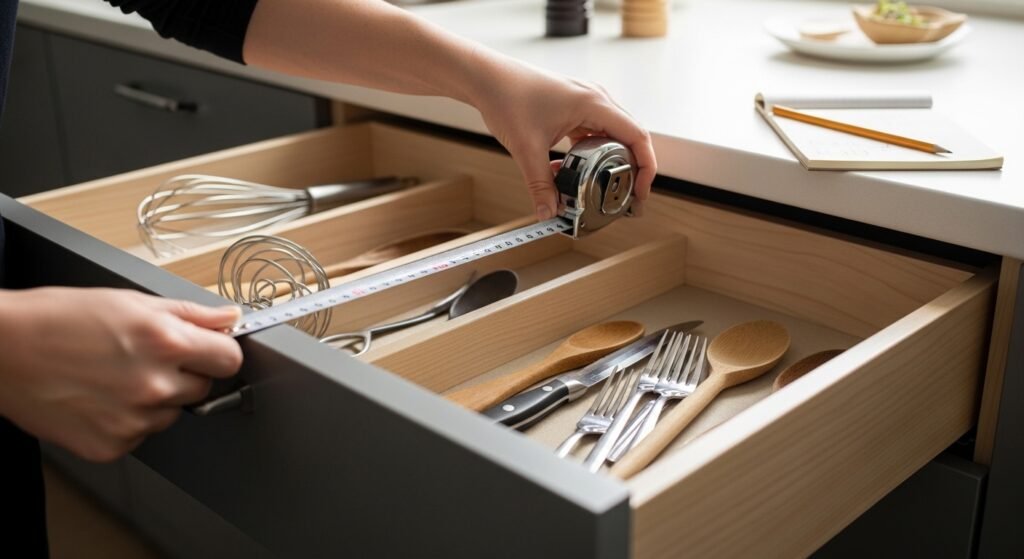
Step 2: Measure Your Drawers
Here’s where I messed up the first time.
I bought organizers without measuring. Got them home, and they didn’t fit. Too wide, too narrow, wrong shape—total waste of money.
Now I measure every drawer before I buy anything.
Length, width, depth. Write it down. Take the measurements to the store or keep them handy when shopping online.
Also note if your drawers have weird features. My silverware drawer has a random bump in the middle for some reason. Had to account for that.
Step 3: Get the Right Organizers
This is where it gets fun.
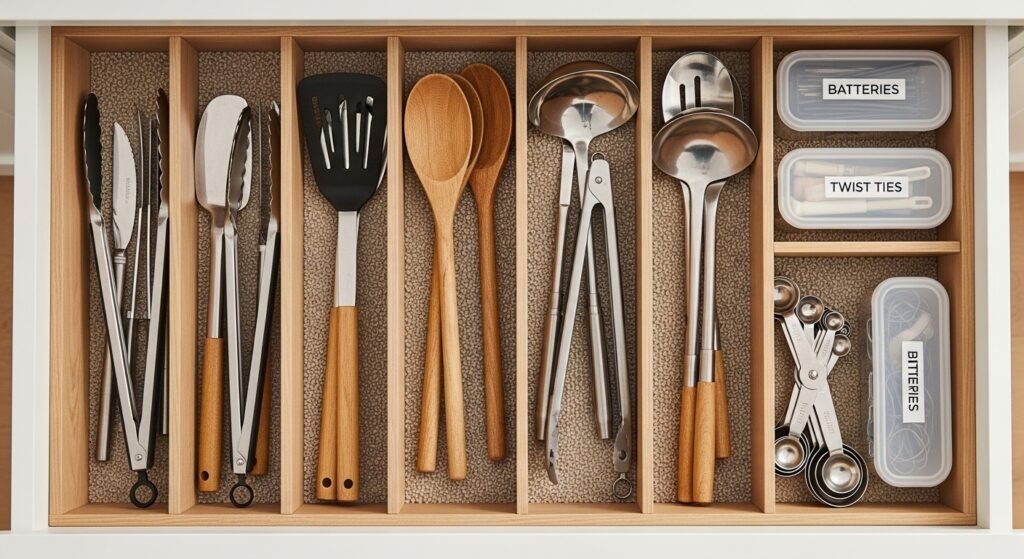
For flatware:
A simple cutlery tray works. Make sure it has slots for different sizes—forks, knives, spoons, and maybe a longer section for serving pieces.
For utensils:
Adjustable dividers are your best friend. They expand and contract so you can customize the spaces. I have sections for spatulas, whisks, ladles, and all the random stuff that somehow accumulates.
For deep drawers:
These are tricky. Stuff just piles up. I use small bins inside deep drawers—one for measuring cups, one for measuring spoons, one for kitchen scissors and thermometers. Keeps everything contained and easy to grab.
For small stuff:
Rubber bands, twist ties, takeout chopsticks (we all have them)—put them in tiny containers so they don’t escape and take over.
Step 4: Think About How You Actually Cook
This seems obvious, but I didn’t do it at first.
I organized my drawers by… vibes, I guess? Everything looked neat but nothing was where I needed it.
Now I group by use.
The prime real estate (easiest-to-reach drawer):
Everything I use daily. Spatulas, wooden spoons, tongs, measuring spoons, peeler. If I touch it most days, it lives here.
The second tier:
Less frequent stuff. Baking tools, meat thermometer, pastry brush. Still accessible but not taking space from everyday items.
The bottom drawers:
Occasional use and overflow. Specialty gadgets, extra serving utensils, stuff that only comes out for holidays.
Think about your workflow. Where do you prep food? What do you grab most often? Put those things closest to where you use them.
Step 5: Use Vertical Space
Some drawers are deeper than others. Don’t waste that height.
I have one deeper drawer where I use small stacking bins. On top: measuring spoons and small gadgets. Below: dish towels rolled up neatly.
Another drawer has a two-tier expandable organizer. Top level holds smaller stuff, bottom level holds larger items. Doubles my usable space.
If you’re not looking up and down, you’re missing storage opportunities.
Step 6: Label Things (Even If It Feels Dorky)
I resisted this for a long time. Felt too organized, too precious.
Then I labeled a few bins, and my family actually started putting things back in the right places.
Magic.
You don’t need a fancy label maker. Masking tape and a sharpie work fine. Just write “spatulas” or “measuring cups” and stick it on the bin.
Now when my kid unloads the dishwasher, the utensils actually end up in the right slots. When I’m rushing and throw something in a drawer, I know roughly where it should go. Maintenance became so much easier.
Step 7: Liners Make a Difference
This is a small detail, but I’m a fan.
Non-slip drawer liners keep organizers from sliding around every time you open and close. Everything stays where you put it.
Also protects the drawers themselves from scratches and dings.
Takes five minutes to install and makes everything feel more intentional.
Step 8: Maintain the System
Here’s the hard truth.
Organizing is easy. Staying organized is the real work.
I do a quick tidy every week. Five minutes, max. Just putting things back where they belong.
Once a month, I do a slightly deeper check. Anything migrated to the wrong spot? Anything new that needs a home?
Once a season, I reevaluate. Is this system still working? Do I actually use that garlic press? Has anything broken?
The goal isn’t perfection. It’s just preventing the slow slide back into chaos.
What My Drawers Look Like Now
Top drawer: Everyday utensils in adjustable dividers. Spatulas in one section, wooden spoons in another, tongs and ladles in their own spots. Everything visible, everything reachable.
Second drawer: Baking supplies. Measuring cups nested together, measuring spoons in a small bin, cookie cutters in another. No digging.
Deep drawer: Dish towels rolled up vertically so I can grab one without unstacking a pile. Also random stuff like kitchen twine and extra bag clips.
Bottom drawer: Occasional use gadgets. The fondue pot that only comes out in winter. The extra whisk. The thing I use twice a year but can’t bring myself to toss.
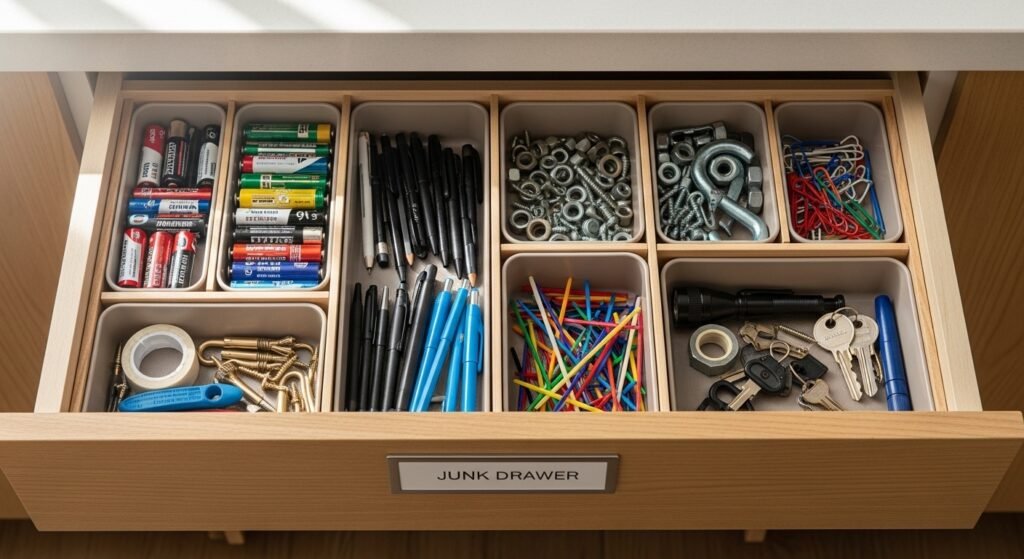
Junk drawer? I still have one. But now it’s a small container inside a drawer, not a whole drawer of chaos. Batteries in one little bin, pens in another, random hardware in a third. Contained and manageable.
What I Learned
That first day I dumped everything on the table, I felt overwhelmed. How did I accumulate so much stuff? How would I ever make this make sense?
But drawer by drawer, it came together.
The key wasn’t buying fancy organizers or achieving some magazine-worthy look. It was just giving everything a home and putting things back where they live.
Now when I cook, I open a drawer and immediately see what I need. No digging. No frustration. No scavenger hunts for the peeler while my onions burn.
Honestly? It makes me enjoy cooking more. Which sounds dramatic for something as simple as organized drawers, but it’s true.
Small changes add up.
What about you?
Do you have a drawer that’s become a black hole of random stuff? Found any genius organizing hacks?
Drop a comment and tell me about it. I read them all and I’m always stealing ideas from other people.
And if this was helpful, pass it to someone who deserves an easier time in the kitchen. We all do. 🍴✨